#shown here with shaders
Explore tagged Tumblr posts
Visit Tumblr Blog
Explore Tumblr blogs with no restrictions, modern design and the best experience.
Last Seen Tumblr Blogs


Fun Fact
Hackers stole 65M passwords from Tumblr in 2013.
Text
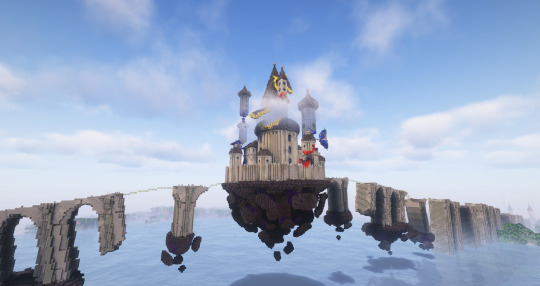

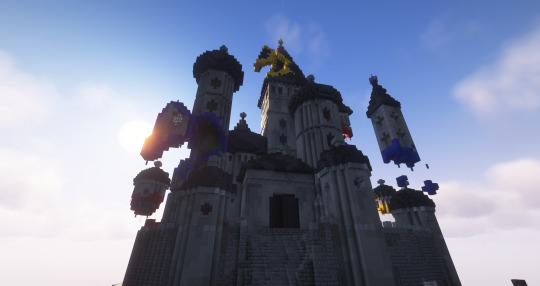
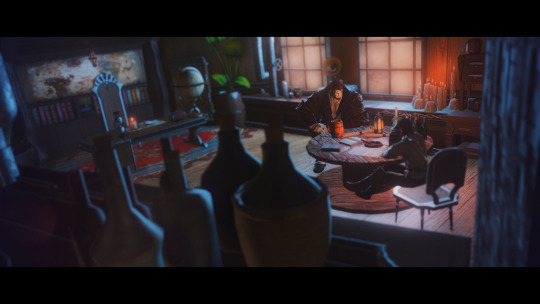
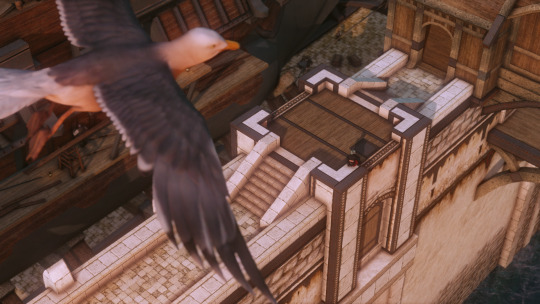
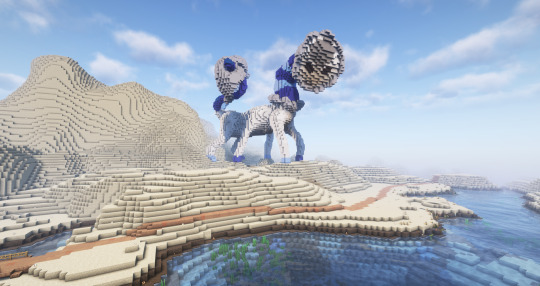
"I see through the bricks to the sea, Crumbling Castle"
This is my Crumbling Castle, a part of my multi-year project creating an immersive walk-through experience set to King Gizzard's Polygondwanaland album in survival Minecraft. This build sets the stage and acts as a sort of prologue for the rest of the album. I've worked on this project for over a year thus far and have several other builds I have not gotten around to posting yet, so stay tuned!
Castle in The Air A New World Deserted Dunes
#kglw#minecraft#minecraft build#my art#the polygondwanaland project#shown here with shaders#built in survival#king gizzard and the lizard wizard#polygondwanaland
35 notes
·
View notes
Text
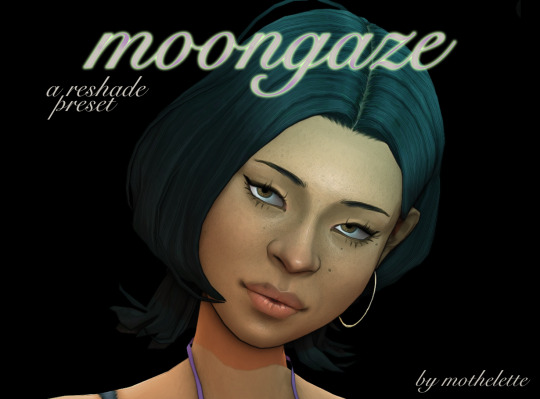

moongaze (dl on patreon, free)
a reshade preset for cas info under the cut

!! all pictures were taken with @vyxated's cas lighting mod (frontglo_v2_rim) & asw's black cas background !!
i've been asked multiple times so here's my cas reshade preset! i created it in reshade 6.3.1 so it might not look the exact same in another version. i made it specifically for close ups/portraits but it also works for fullbody pics (better without the comic shader)
!! this preset uses relight (paid, found here) & this comic shader !!
if you don't want to/can't get relight, i recommend using one of @vyxated's cas lighting mods as they're gorgeous & will definitely enhance your cas experience!
key binding
toggle relight: numpad 8 toggle comic shaders: numpad * bloom (not shown in preview): numpad 9 halftone (not shown in preview): numpad /
tell me if you encounter any problem & don't hesitate to tag me in your pics <3
love y'all
xxx
#ts4#ts4 reshade#sims 4#sims 4 reshade#reshade preset#ts4cc#mycc#cas reshade preset#ts4 cas#sims 4 cas
184 notes
·
View notes
Text
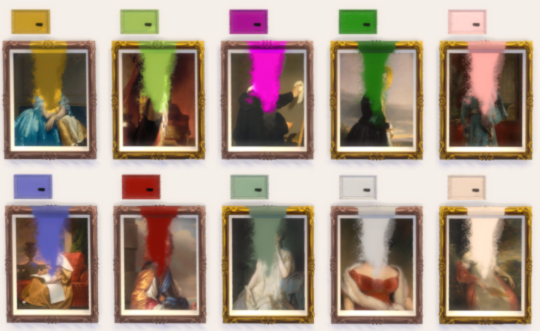
Spilling Paint Duo

Coming in third in the community poll: the Spilling Paint artwork! So here it is – a duo gallery painting for the beautifully clumsy artist at heart.

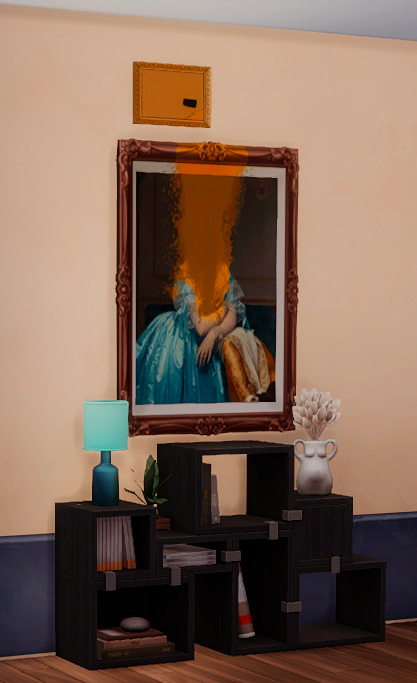
This set features 10 swatches, some are available in a warm brown, some in a gold-toned frame. The swatches below are shown without shaders.
If your Sims need a splash of creative chaos, you can grab it over on SFS.
*DOWNLOAD*
#sims 4 cc#ts4cc#the sims 4 custom content#base game compatible#sims 4#sims 4 download#sims4download#ts4 custom content#ts4 download#sims 4 screenshots#ts4 deco cc#ts4 decor#sims 4 decor#decor
72 notes
·
View notes
Text
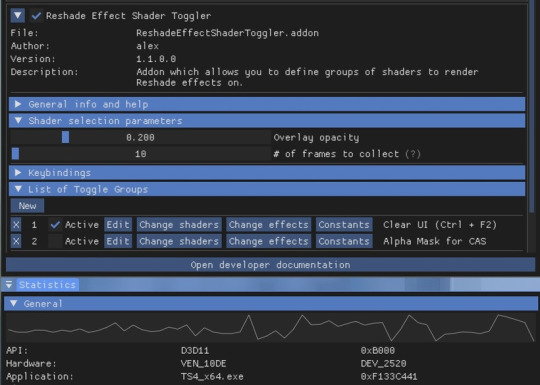
[Reshade add-on] Clean UI for DX11
After so so sooooo many crashes later, I finally managed to create a working setting for this add-on for DX11 games by using an older REST version 🫠
You can read the whole post on Patreon here, or below the cut for those who can't access the site.

As using REST 1.2.0 and above cause crashes whenever I create a setting or attempt to use it for a brief amount of time, I decided to use a much older version of REST (1.1.0), which turns out to be more stable to configure and use. While this means being able to use the add-on for the DX11 game, it has its own set of problems, which may/may not be a dealbreaker for some.
I decided to make a new post since the original one is quite lengthy and I want to keep DX9 and DX11 versions separate due to the different information each version has.
➡️ For the DX9 version, find it here. And here for the Patreon post.
In short, with the help of REST (an add-on for reshade/gshade), you can block/prevent shaders from affecting the UI.
// Things to know if using this version ⚠️
Some shaders will not work properly and will cause some gamma issues. If your preset look different than how it normally is (a lot darker/brighter), enable/disable your active shaders and see which one is causing it. It's easily fixed by using an alternative shader that achieve a similar look.
Shaders affected (ones I've known so far): SMAA & MartysMods_SMAA (FMAA is not affected, use this instead), FilmicAnamorphSharpen, ArcaneBloom & NeoBloom, Glamarye_Fast_Effects, MagicHDR, CRT_Lotte.
You will not be able to change your window resolution, either via graphic settings or by using SRWE. This will cause your game to stop and eventually having to force stop it with the task manager. It is recommended that you have your game in Windowed Fullscreen to avoid issues and have the add-on disabled if you want to change the resolution in-game.
// Required Files
REST add-on v 1.1.0 (testing)
REST config for v 1.1.0 (simfileshare only)
// Installation
Have ReShade with full add-on support installed for this to work.
Download the REST_ x64_1.1.0 add-on from the github linked in the requirements section as well as the config.
Extract the ReshadeEffectShaderToggler.addon file into the game's \Bin folder where your TS4_64.exe is (where you had also installed ReShade).
If you use GShade: place the .addon file in the gshade-addons folder.
Still in the \Bin folder, drop the x.x_ReshadeEffectShaderToggler_DX11.ini file you downloaded.
If you use GShade: place the .ini file in the gshade-addons folder along with the .addon file. If my config doesn't show up in the add-on menu, move it back to the \Bin folder.
Rename the file and remove the prefix and suffix. Both .addon and .ini file should share the same name for the add-on to recognize my settings = [ ReshadeEffectShaderToggler.ini ]
Open up your game. If you see the same menu as below then you’ve successfully installed the add-on & settings! Restart if needed.
I've set the shortcuts for Clear UI to match with my Effect toggle key, which is Ctrl + F2. If yours are set differently, match the shortcut of this toggle group with your effect toggle key:
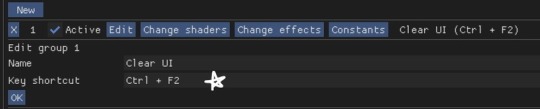
Reason being, having the toggle group active will prevent you from enabling/disabling your preset. Changing the shortcut will allow you to disable & enable your preset and toggle group at the same time.
To avoid the add-on from not working, make sure to do the following:
Enable post processing effects
Disable laptop mode & edge smoothing
Set 3d scene resolution to high
As long as all of the above are met, you should not encounter any problems. This has been tested to work on all graphics settings from low to ultra. External modifications (like Simp4Settings) may/may not have an effect, but from the testing I've done it has shown no problems so far.
216 notes
·
View notes
Text

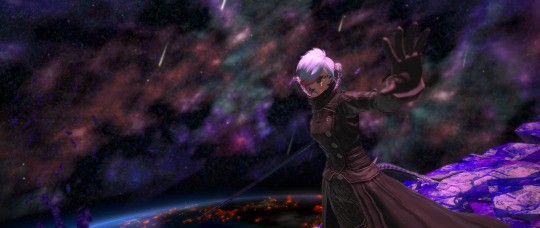
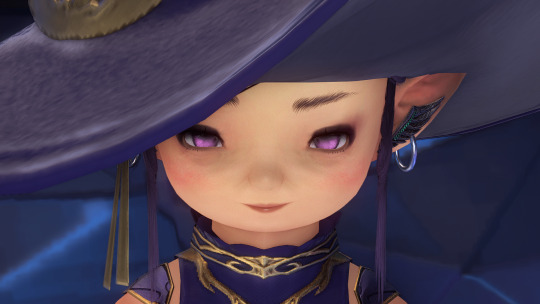
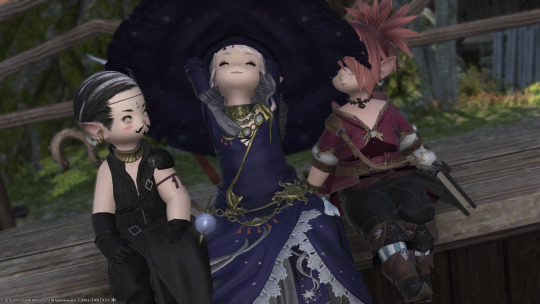
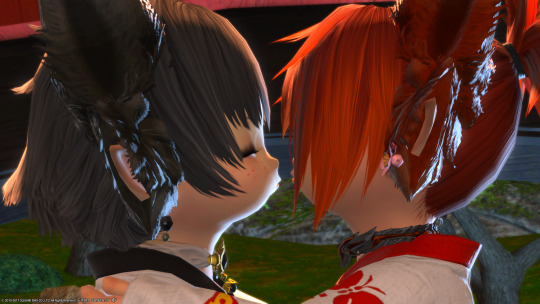
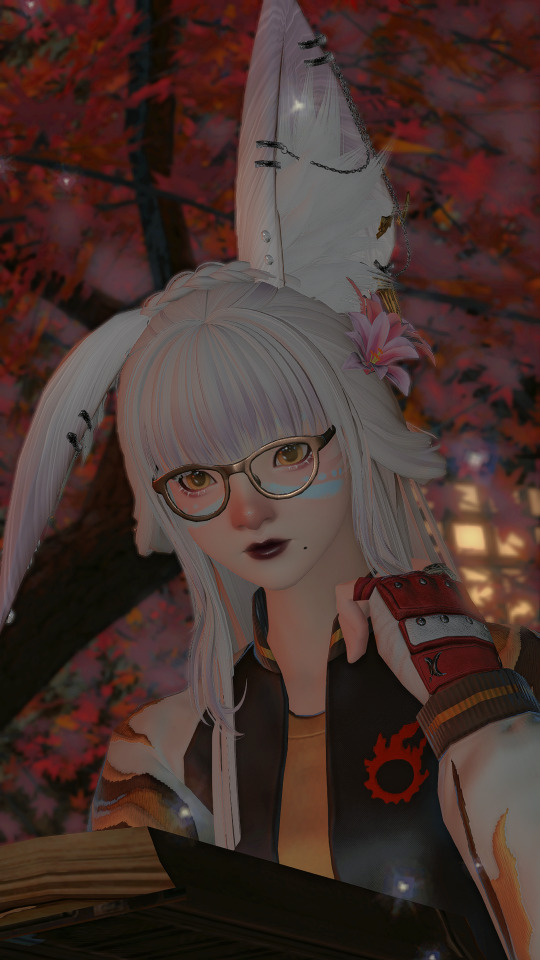
\o/ It's Zee's Nameday today \o/
Over the years Zee has gone from a little blank slate for me to experience FFXIV's story to a character with... 44 pages of lore and me making 3 of OC's for her party, and now my s/o's OC coming into her lore a bit more as he builds his OC's own lore up (I'm a bad influence). I wish I had more energy for them than I currently do, but the support I get from what I can do pushes me to do better when I can~
~ ~Heres to another year of growing with my beloved little lizard~ ~ ..~Thank you for all the love and support you have shown her, I can't find the words to say how much it means to me (especially lately)~..


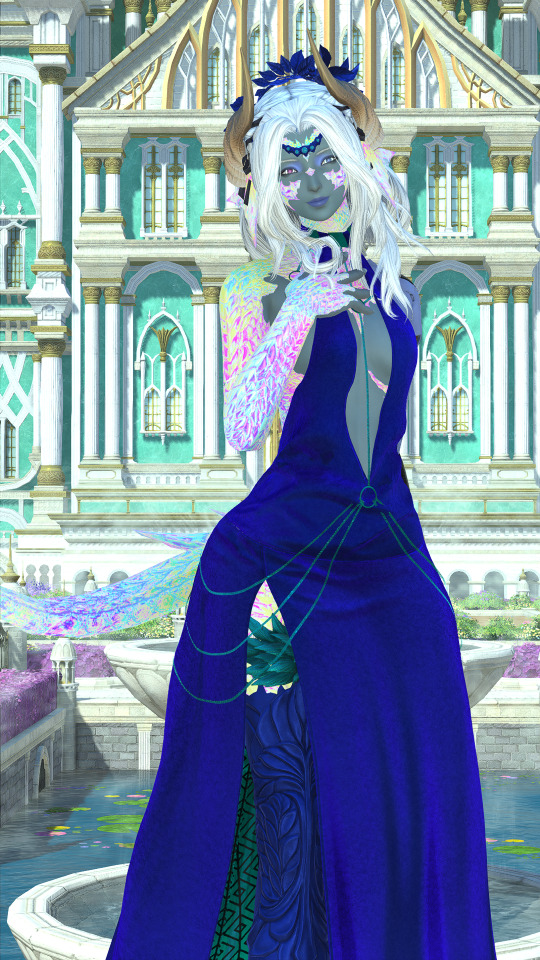
Zee has been in game for over 7 years now~ So I made a quick little photo shoot for her friends, her party, and her loves in celebration for her 7th nameday \o/ also as an excuse to show her off in this dress (no shaders I'm too tired I spent wayyyy too long on these poses)
55 notes
·
View notes
Text
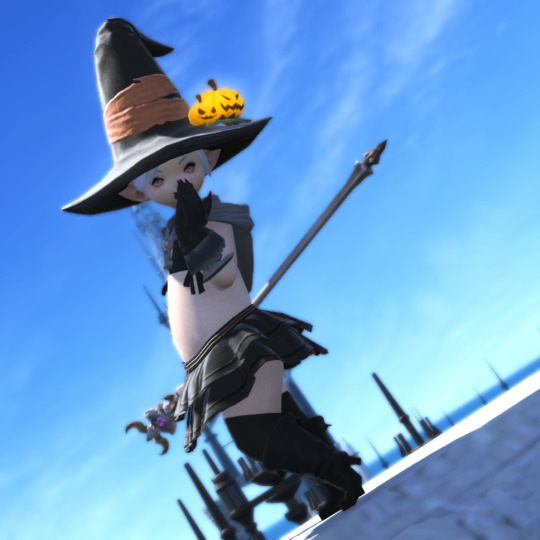
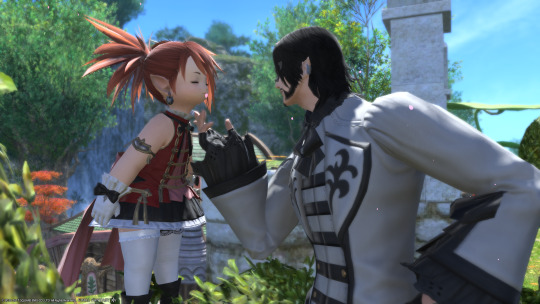
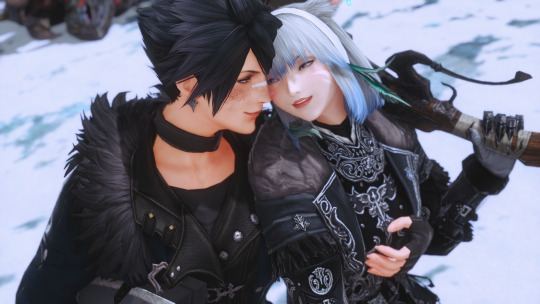
Then and Now
---------- Taking @iron-sparrow's open tag for this one!! Tagging: Whoever is reading this because 99% of my followed and mutual blogs already have been tagged lol ----------
2021 ^ 2024 v
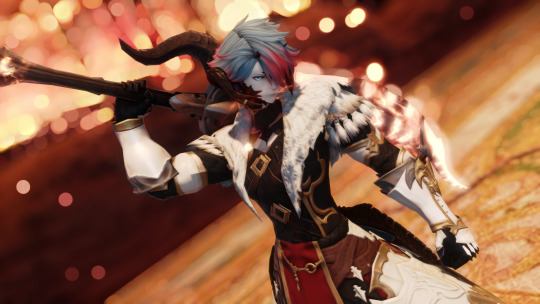
First photo is my first ever attempt to gpose! No mods, no shaders, no nothing. It was also back when I had an ultrawide monitor so the aspect ratio is off lmao.
Not the FIRST design of Hazel, but that's not shown here simply because I don't have any screenshots of my old male Raen look. Even after changing to a Xaela though, Hazel has had a ton of changes to her-
Changed her name from Hazel Kay to Hazel Kha (weird to think that it's probably been Kha for longer now)
Went from a min height Au Ra to taller than what normal max height would be
Customize+ scaling to try and bulk her up ever so slightly
Skin tone changed from a natural pale to pure white
MUCH thicker tail, and even without mods I've swapped over from tail 4 to tail 3
Black scales instead of the default blue and custom modified horns
Limbal rings changed from red to light blue to match her hair
Hair is presented as more unkempt and "wild"
She's an actual OC now with story and personality instead of just being my MMO character
I used to be a fantasia addict for a long while but I always ended up coming back to this general look for my character, and to be honest nowadays I can't ever see myself changing all that much. This IS Hazel, and I couldn't be happier with her.
41 notes
·
View notes
Text
Then & Now: OCs & Gposing
Tagged by @sparrowsong-7 @l3ylines & @lynxden (thank you <3)
This'll be long and all over the place because I took a very different direction with gposing this years and it's been very uh educational. Learned to use posing tools less than a year ago and it's really given our characters more life and made a world of difference. Old embarrassing screenshots incoming.. (but the point here is to show ~Growth~ and I hope it motivates you to keep improving too. and push through all the bugs and that existential ennui hit when your game crashes before youve taken a single screenshot ;-;)
-
Random sentimental observations first, going through old folders..
My gurl aged. But the older she got the happier we both were. We discovered ✨boundaries✨ together.

Her fem elezen Era of 2013-2014 had a bit of both Gabriel & Theneras in her. Nerdy elf and grumpy elf were always there. Never realized. (also apparently we've always had that annoying light/shadow shimmer effect and it's not just a post DT lighting thing)

Apparently I've been wearing the same outfit since 2018. Sometimes you just put on a hat and your character says Yup. That's me. Forever. You'll just have to find a way to squeeze under. (sorry for +6 years of clipping, sweetie, but it was your gift and I'm never taking it off)
Gabriel and @pocketyoukai's Yuusei were besties since 2016 before they were RP characters. and he'll always be a loving doting dad retainer to her sister.

2020- Goose & Amalthea were girlfriends before we realized they were girlfriends. The ship sailed itself.

2018: discovered GIF making. Tried to put it to good use..


…but I just kept making shitposts. which didn't last long thankfully.

..And I'm glad it was short-lived, because when I focused more on telling stories through gposing, especially this past year, it's like my brain got rewired to view this world differently, through the eyes of a little sprout again. If I was going to use screenshots only and no words, I had to take shots/gifs of different things to set my scene and experiment with angles I wouldn't otherwise have considered (and fail 50% of the time and try something else. timing is so tricky😭)


..not to mention, when you're thirsty and need to work around censorship you also get creative with angles and visual subtext

It's 10x more fun and rewarding, albeit challenging especially if you don't want to use any crime tools. But doable. And just as fun and rewarding. And I want to do more of this (and fail and keep experimenting) next year and see you tell more of your stories your way too. and be inspired by and fall in love with your characters.
..I was very much 100% vanilla, as in not even shaders, until early 2020. And started using posing tools about a year ago. When you say "your characters have more character!" (you know who you are) I know exactly what you mean now and that makes me very emotional ;-; it really wasn't the case until less than a year ago. a lil criminal activity goes a long way.
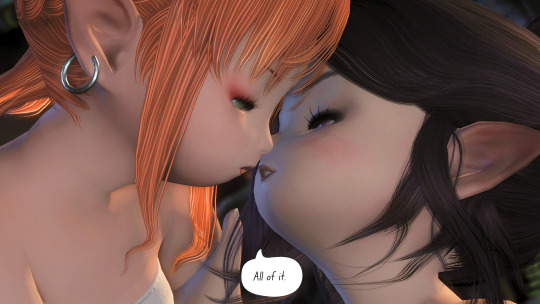
Also vanilla kisses were so hard to gpose and turned out so funny. Note to self never to /puckerup for kisses. ever. But we did our best and learned a lot. A ton more kissing next year for sure.
-
A little late so not sure who hasn't done this yet. Tagging my new favorite gpose storyteller @quiethealer , @squidzure (you've shown us Rhea's glow-up but where is Birdie's glow-up!), partner in storytelling & crime @pocketyoukai & @pumpkinmagekupo
and if you're seeing this and are happy with the growth you've done lately... doeet. Show me your embarrassing shots and the shots you're most proud of this year.
#This is by no means encouraging you to do crime if you don't want to btw...#you can see this as Look how long you can have fun with vanilla gposing instead#Then and Now#ffxiv gpose#bean poses#ask game#Yasumi#Yuusei#Gabriel#Theneras#Goose#Amalthea#Yuuko#House of Beans#God these Thens and Nows gettin me emotional#you guys are spreading so much inspiration..
34 notes
·
View notes
Text
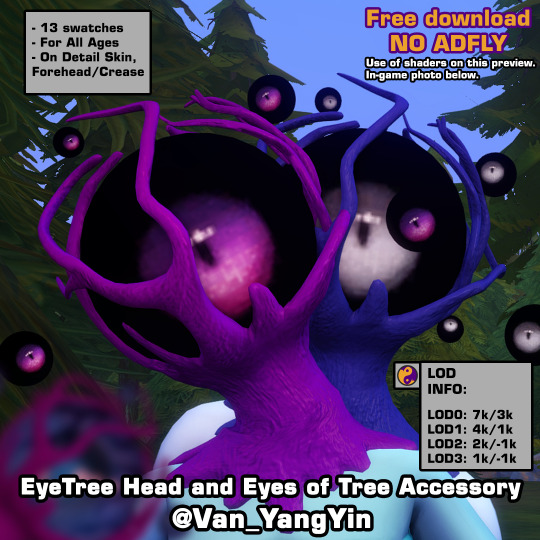
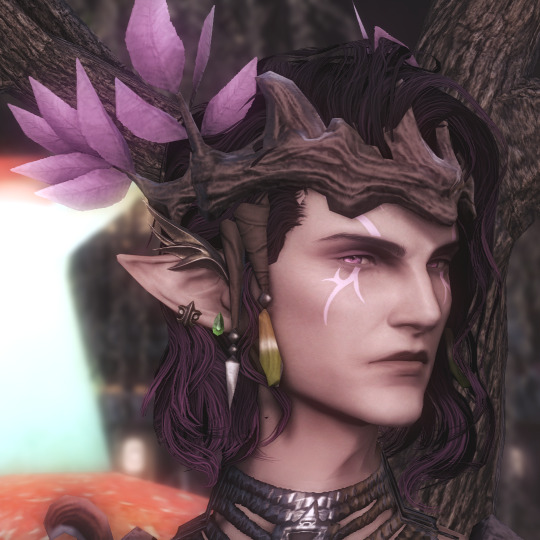
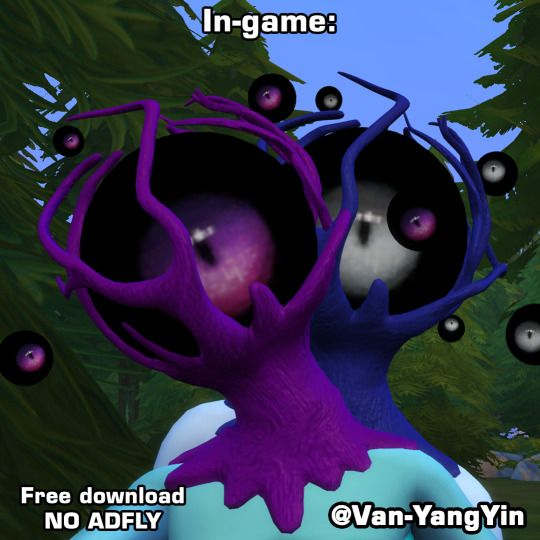
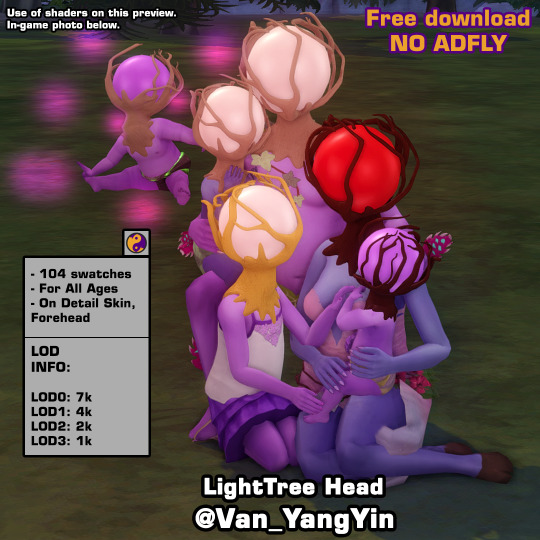
Following Custom Content I shared the other day, here is EyeTree Head Set that contain a EyeTree head and Eyes of Tree Accessory for all ages. Hope you enjoy this one! 💗
Short brief when this post is published: I'm currently without pc because it's being repaired since it was failing me, so I leave you this publication that I left prepared. Until I have it back, it's possible that I won't be much on my social medias. When I return I'll answer to your lovely asks and replies. @lea-heartscxiv will probably lend me his, but it will only be for occasional times like posting things we've worked on together or new CC if pc takes too long to repair. Thank you for your patience with me ❤
They look at you, they judge you, they discriminate against you. From a planet far away from Sixam, called Lerighett, reside these tree-headed beings with eyes. They're said to be of many varieties and species, though residents of the hidden lands of Heyadee are one of the most frowned upon for being so perceptive and judgmental. If they have more eyes around them, they may be even more judgmental for being able to see beyond your soul. 👁️🌳
Download under keep reading ↓
If you download my CC it means your agree with my T.O.U (English/Español/日本語).
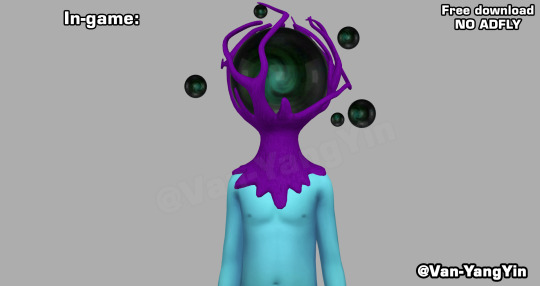
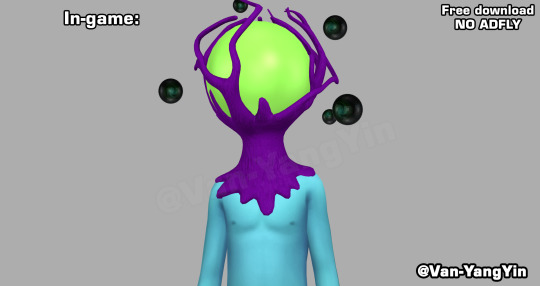
EyeTree Head
General Info:
13 swatches
Base game compatible
Located on Detail Skin, Forehead
all ages
disable for werewolves (don't show good on them)
all LOD's
All Maps (Diffuse, Normal, Specular)
Mesh and texture made from scratch by me
Custom Thumbnails
Compatible with higher and lower game sliders
Known problems: Some parts of the trunk may go deeper into the skin. Since is placed in Skin Details, Forehead, both packages are shown, no matter the gender, but they're written as Male Frame and Female Frame on thumbnail so that they can be easily recognized. Try to use them properly so they don't look bad unless that is the result you want to achieve.
LOD Information: LOD0: 7232 poly | LOD1: 3615 poly | LOD2: 1806 poly | LOD3: 903 poly
IF YOU LIKE MY WORK PLEASE CONSIDER BECOME A PATREON OR TIP ON KO-FI. ANY HELP IS ALWAYS WELCOMED BUT ALWAYS OPTIONAL. YOU CAN ALSO COMMISSION ME HERE OR FROM TUMBLR, IF YOU WANT ME TO DO SOMETHING SPECIFIC FOR YOU. THANK YOU FOR YOUR SUPPORT!
※Choose download the one/ones you want the most or only download Merged: "_T-E_Merged" or "_AllMerged" where all the files are together.※
✨DOWNLOAD LINK✨ (Patreon ~ Always free, no adfly) [Same link]
✨DOWNLOAD LINK✨ (SFS ~ Always free, no adfly)
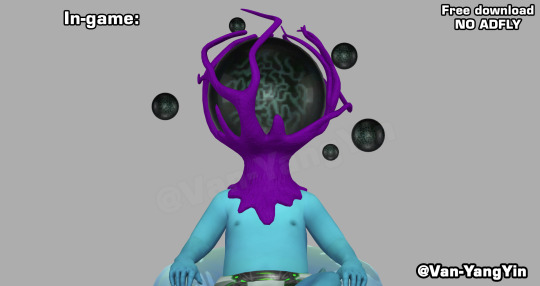
Photo in CAS and in-game photo without shaders:
~⭐️~
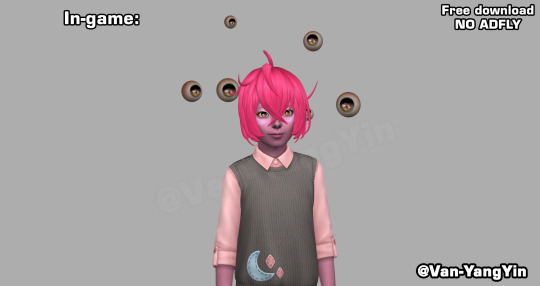
Eyes of Tree Accessory
General Info:
1 swatch, since use eye texture
Base game compatible
Located on Detail Skin, Crease
all ages
all LOD's
Mesh made from scratch by me
Custom Thumbnails
LOD Information: LOD0: 2880 poly | LOD1: 1440 poly | LOD2: 720 poly | LOD3: 360 poly
Do you want to know what else I'll be releasing this month and on what day? You can support me on Patreon or Ko-Fi and find out in this posts, here (Patreon) and here (Ko-Fi).
※Choose download the one/ones you want the most or only download Merged: "_T-E_Merged" or "_AllMerged" where all the files are together.※
✨DOWNLOAD LINK✨ (Patreon ~ Always free, no adfly) [Same link]
✨DOWNLOAD LINK✨ (SFS ~ Always free, no adfly)
Photo in CAS:
Compatible with LightHead/EyeHead and without LightHead:
~⭐️~
Btw, do you saw my last CC post? ⬇️
HERE
This CC is made in part in honor of the fucking eyes (the big one and the little ones) of Arc the Lad the Twilight of Spirits, who gave me and Lea a hard time many many years ago to defeat them. They aren't the same, but every time I was doing it I was thinking about them. Has anyone else played this game? I loved it and I love it!
Let me know if you find any problem. 🙏❣️ Also if you use this or any of my CC, feel free to tag me so I can see your sims, it will make me very happy to see it!
👀👉MORE DOWNLOADS
Happy simming! 🍀
💛
🛹 You can find me also on Patreon | Pinterest | Ko-Fi | Blogger (Shared with Lea) | Instagram | X (Twitter) | My F.A.Q. | My T.O.U. | MORE DOWNLOADS 🛹
#sims 4 cc#ts4cc#ts4 cc#sims4cc#type: head replacement#type: detail skin#frame: unisex#age: all ages#theme: alien#theme: horror#theme: cute horror#game pack: base compatible#Cute Horror x The Sims 4#VanS4CC#Van-YangYin#always free cc#tw horror body#tw head replacement#tw eyes#tw: horror body#tw: head replacement#tw: eyes#tw just in case
142 notes
·
View notes
Text
How to fix Transparency w/ Lashes and Alpha Hair in Blender! Cycles & Eevee!
(This tutorial also helps with adding transparency to Sims 4 Object cc. If needed, I can make a post on that as well.)
This is NOT a Tutorial on how to fix broken/ glitched lashes in the SIMS game!!!
It was brought to my attention that others do not know how to fix this issue in blender, so I've made this post to help out. This tutorial works for BOTH Eevee and Cycles! (This only matters at the end when in the materials tab.)
None of the CC is Mine! Ty to ALL creators!
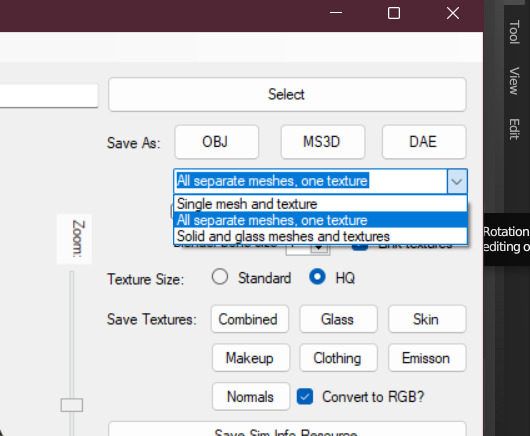
This is work for all methods of DAE exports.
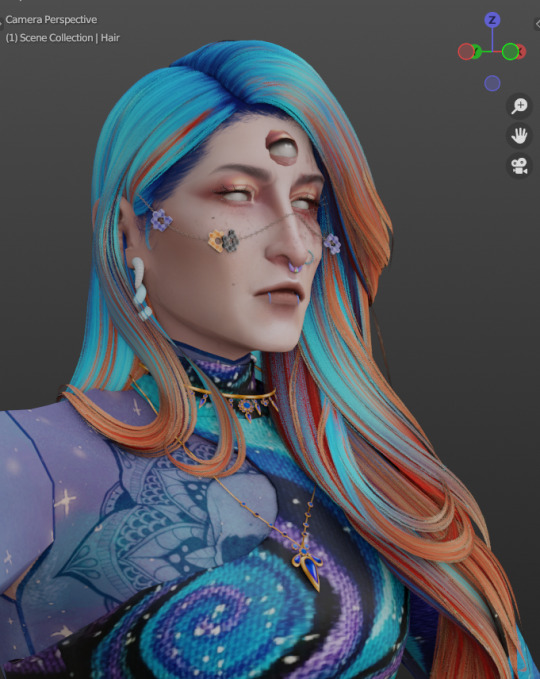
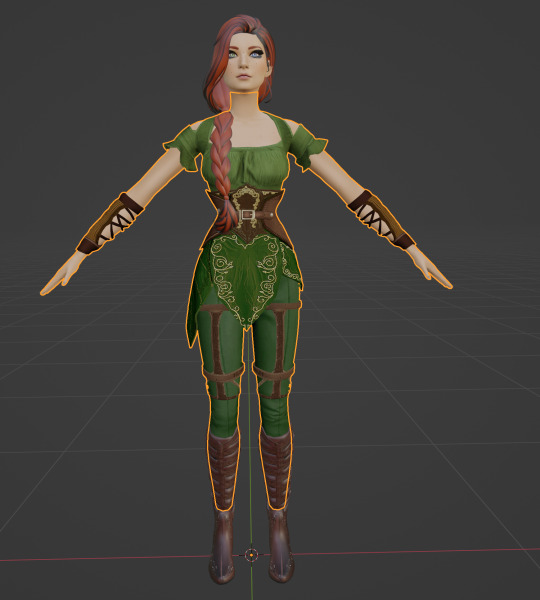
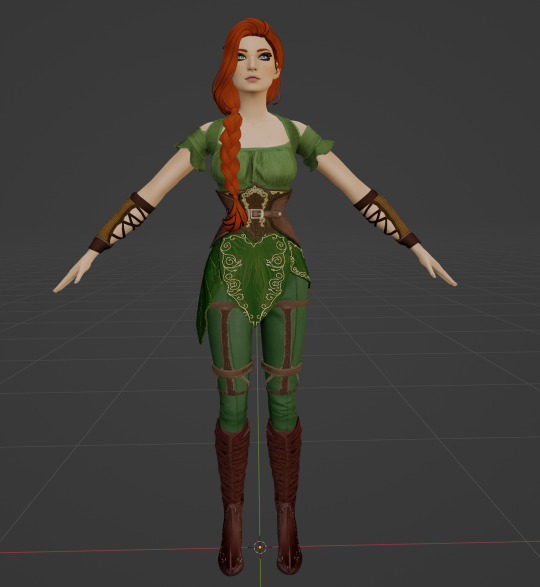
This is Erecen. They will be our tutorial model today.
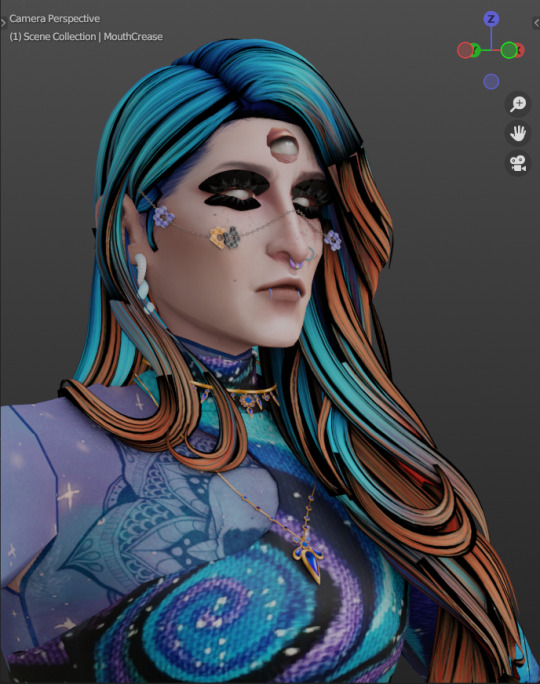
As you can see, the Alpha CC hair and lashes are not... working like how we saw them in game. So! We will need to fix this up within our Shading Node Wranglers to correct this.
(If you use a GLASS mesh, make sure you are shade wrangling on the GLASS!)

(This picture is only showing which is the Glass mesh!) Plz ignore this if you are not using Glass mesh export on Ripper.
Lashes/Hair Transparency
First import your sim and wire the texture nodes how you normally would. Stay in Shade Editor/Shading tab.
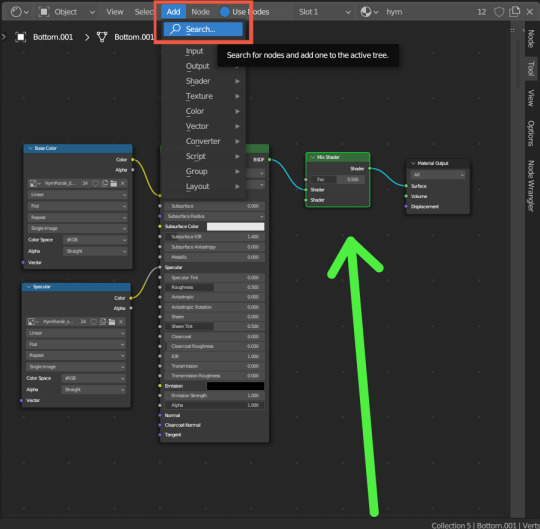
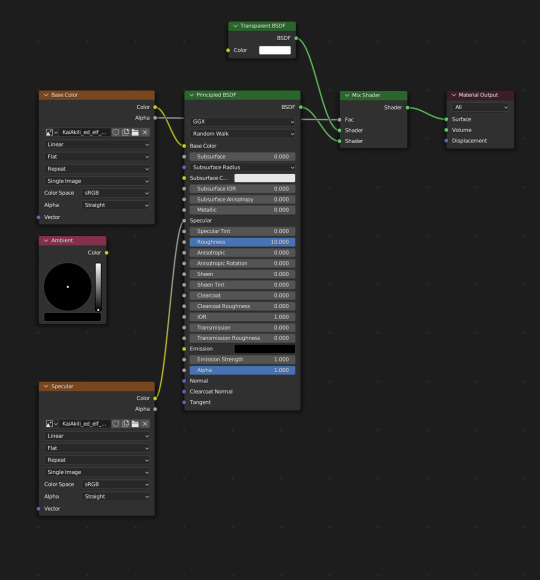
You will now want to Add a 'Mix Shader' node. Search for it by typing in "Mix Shader". Select and now drop it between your Principle BSDF node and Material Output node.
After this, you will want to Add a Transparent BSDF. I added mine the same way as the Mix Shader and have place it under my Mix Shader node.
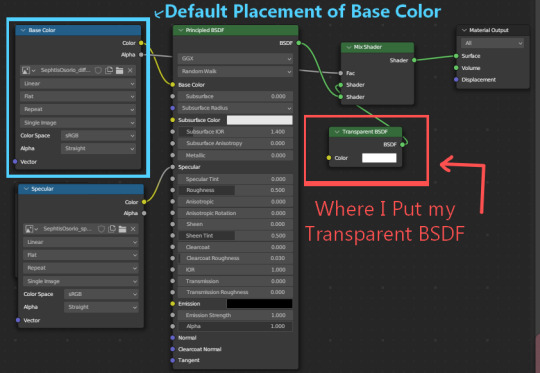
With this Transparent BSDF node, you'll want to wire it to the TOP Green Circle of your Mix Shader node. (1 in pic below) This will disconnect your current wiring from Principle BSDF. This is fine since you now want to wire the Principle BSDF node to the BOTTOM Green Circle of your Mix Shader node. (2 in pic below)
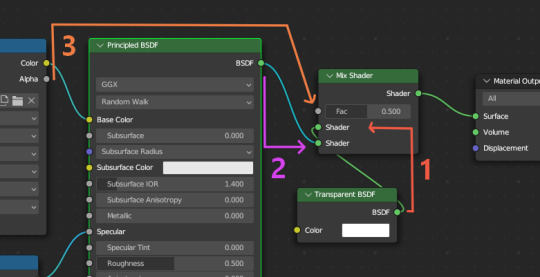
Afterwards, you will now need to go to your Base Color node; (Where your sims diffuse lies!) It should be the top left node, unless you have moved it. (3 in pic above) Now take the Alpha dot and drag it all the way to FAC on the same Mix Shader node. From here, we need to go to 'Editor Type'.
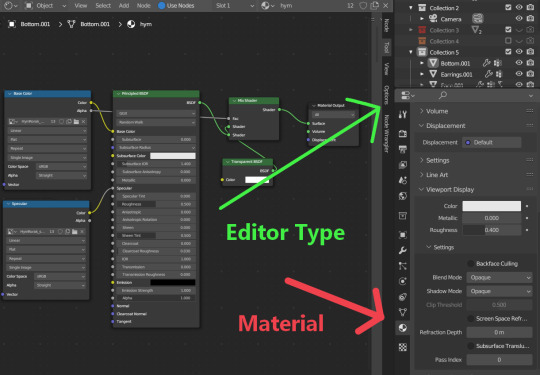
After locating Editor Type, you now want to locate the sphere listed as Material.
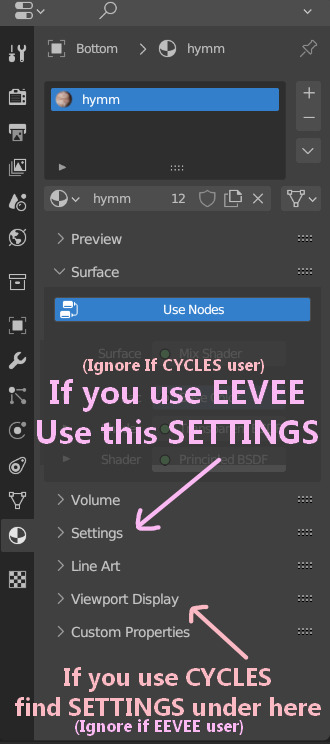
You now want to find the correct SETTINGS tab. Please note how you render your renderings. If you render in EEVEE, take note of the picture above. Same for CYCLES as taking note in the picture above. This is very important since the SETTINGS options switch between these two areas depending on the Engine.
In Eevee, this should be in the first SETTINGS tab in the materials properties tab.
In Cycles, the SETTINGS you will need is located under the tab listed as Viewport Display. From there, a new drop down will be available called Settings. (This is the correct SETTINGS you want)
Either engine will now have a few modes now visible.
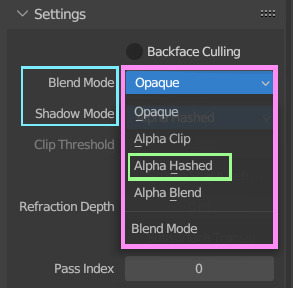
For both Blend Mode and Shadow Mode, change them from Opaque to Alpha Hashed. (It is only required to change Blend Mode to Alpha Hashed for the transparent textures to work. Hashing shadows makes a nice balance of translucency and ambient occlusion.)
And that should be it! Your lashes/Alpha CC hair should be working correctly now!
I hope this helps! If not, please feel free to msg me of any other further know issues. Thank you to @spookyxdoom for bringing this topic up!
I even had my bf try it out without knowing a single thing about Blender and they figured it out just fine with this tutorial.
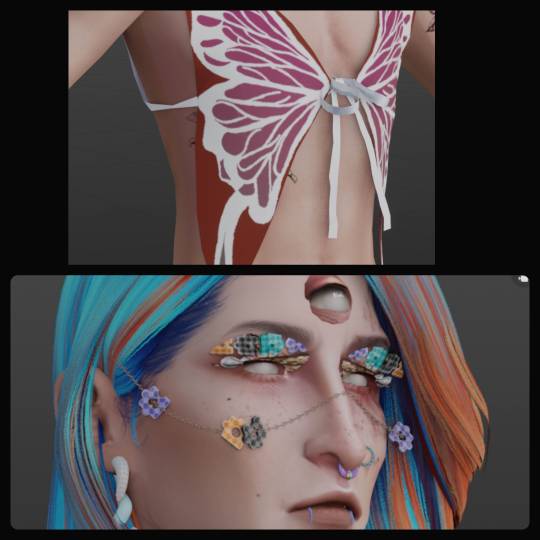
I already plan on doing other tutorials on how I fix overlapping textures as shown below.
35 notes
·
View notes
Text


Welcome home
The first (and most likely last) Minecraft skin I made...

Feel free to use / edit, just don't claim as your own.
With love, from Marmar (Tini) (that's me)
If the picture above doesn't work for any reason, you can find the png here (mega)
Shown using: Skin Layers 3D, MakeUp - Ultra Fast shaders, Excalibur (resource pack), Bingus (painting resource pack) Minecraft 1.20.1
#Wayne#scarlet hollow#minecraft skin#Marmar's originals#putting the miner back in the mine(craft)#seriously though - go play Scarlet Hollow
10 notes
·
View notes
Text
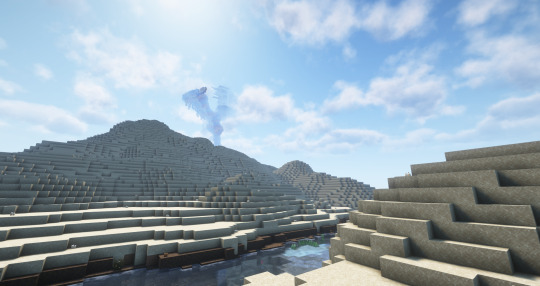
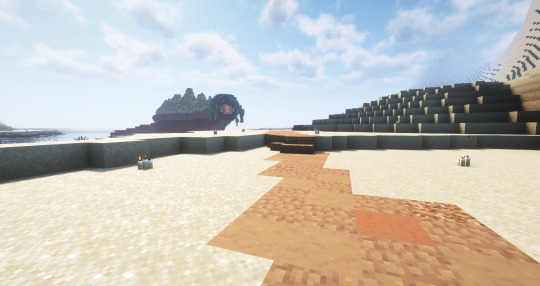
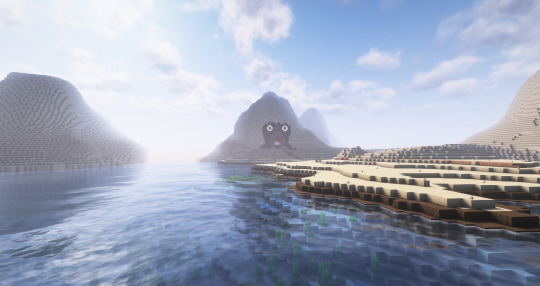
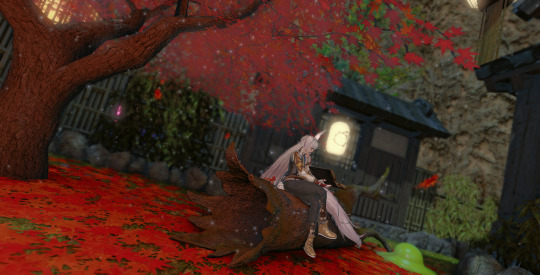
Deserted Dunes Welcome Weary Feet
Part of The Polygondwanaland Project
Learn more about Hummus (second photo) and her artist here
I placed 500k sand for this project; this is not a real desert biome. It rains here, I'll have to post pictures of that another time.
#kglw#minecraft build#minecraft#my art#shown here with shaders#built in survival#polygondwanaland#king gizzard and the lizard wizard#The Polygondwanaland Project#The creatures are#Bearrett#Hummus#Globert Gregg#and Migraine#I placed 500k sand for this project plz clap
15 notes
·
View notes
Text
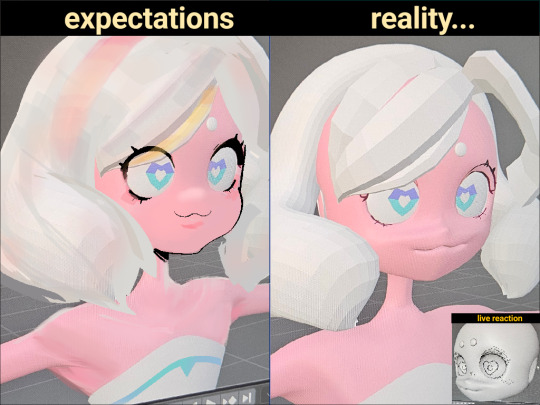
Nvm, i guess no post today (or yesterday)
Its supose to be a thank you for the 60 people that liked the art I made of sayu and want to show more like this one that I've been working on for some time
Not only did I not post it yesterday
Its dang gone from my drafts
I guess it's my call to work on it and make it more...
I could have sworn i saved it
Presentable
Cuz you deserve better than to look at that thing
( i know its not done but, looking at it for more that five seconds demotivates me)
It may not be shown here but other part of the model are already done
Just untextured
Her tail,fins I guess her body and face too? In terms of polish,her hair is still in the block in stage and her hands
Oh damn her hands
I've been avoiding them for quite some time

At the same time figure out what approach i should do to make it look 2d because depending on the style will change how I should approach the topology and there are many ways to approach the shaders too ( And I'm really stumped, I dont know what choose )
This will probably won't be seen by the same people but I want to show it either way
Will be showing the full body once I'm done modeling the entire thing
(Texturing is a separate step)
7 notes
·
View notes
Text
Hang It on a Stripe – Poll Winner Painting

The poll has spoken—and stripes won your hearts! So, as promised, here's the Hang It on a Stripe picture frame.
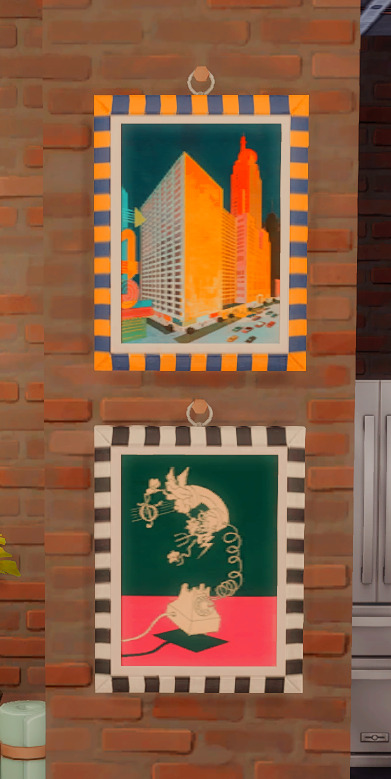
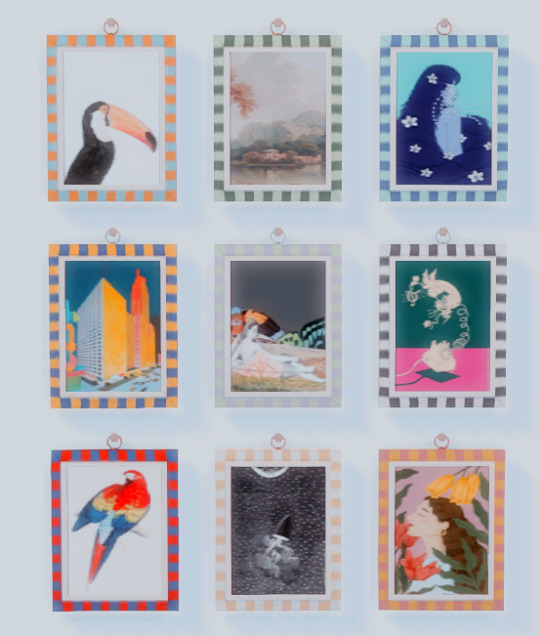
This decorative piece comes in 9 swatches, featuring vibrant striped frames.
The first three are paired with gold metal rings,
the middle three with silver,
and the last trio with a soft bronzy rose gold. Each one is hung from a simple wooden dowel for that perfect touch of charm.
The swatches on the right are shown without shaders.
I’m really happy with how it turned out—hope you are too! You can snag it on SFS:
*DOWNLOAD*
#sims 4 cc#ts4cc#the sims 4 custom content#base game compatible#sims 4#sims 4 download#sims4download#ts4 custom content#ts4 download#sims 4 screenshots#decor#sims 4 decor#ts4 decor
24 notes
·
View notes
Text

Beginner Blender Tutorial Basic Render: Part One (Importing a Sim and Adjusting Textures)
To learn the basics, we'll begin with a super simple render: one sim, one pose, one background.
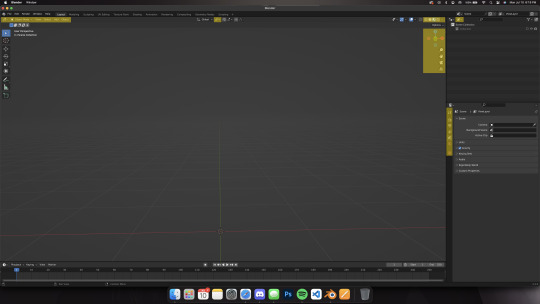
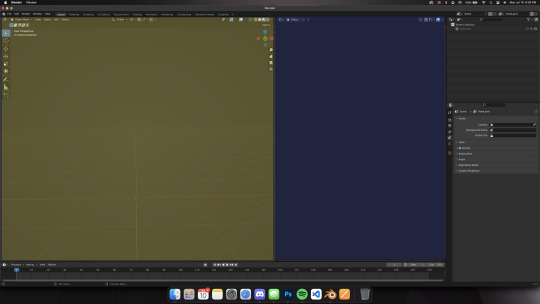
But first, the anatomy of blender.
(image & list courtesy of Blender's online manual)
Yellow - 3D viewport (workspace) The 3D Viewport is used to interact with the 3D scene for a variety of purposes, such as modeling, animating, texture painting, etc.
Green - Outliner The Outliner is a list that organizes data in the blend-file, i.e. the scene data, Video Sequencer data, or anything that gets stored in a blend-file.
Blue - Properties The Properties shows and allows editing of many active data, including the active scene and object.
Red - Timeline The Timeline editor, identified by a clock icon, is used for manipulating keyframes and scrubbing the Playhead.
The tools I use most I've highlighted below:
I won't outline their uses just now, but we'll be going over them as we use them.
Different creators like to split their blender window up in different ways, but this is my preferred setup when I'm working:
I use the yellow half of the screen as a render preview/3D workspace
I use the blue half for shader editing, posing, etc.
You can set yours up like mine or find what's comfortable for you.
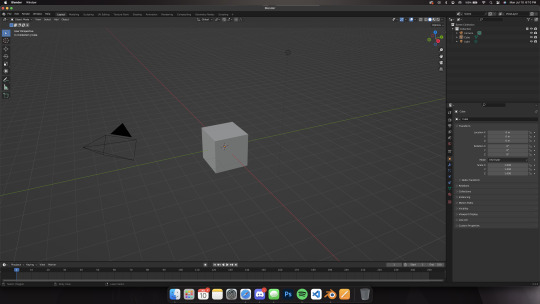
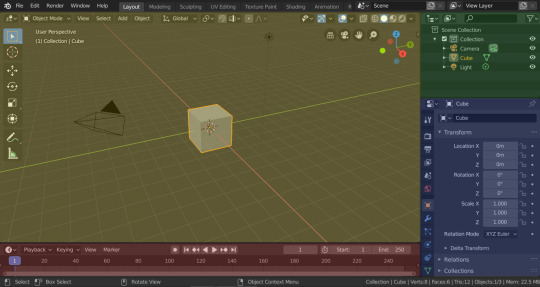
When you first open blender, you'll be greeted by the default cube, lamp, and camera.
Delete them! You can do this two ways:
Click and drag your mouse over all 3 and delete or Select all 3 in the side menu and hit x on your keyboard
Step 1: Importing our Sim
After deleting the default items, we'll import our sim. This tutorial assumes you've already ripped your sim (if you haven't, check here for how to do so!)
Now, let's import.
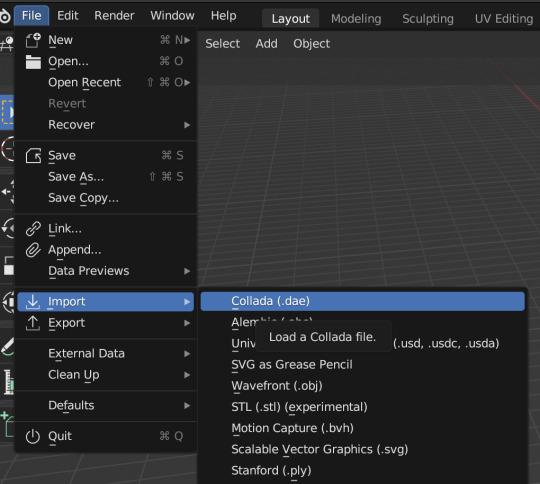
Click file -> import -> collada (dae) Select your DAE and click "import"
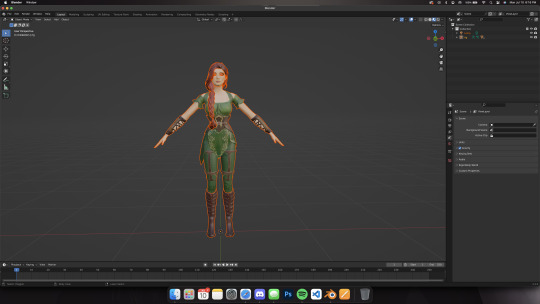
Your sim will look a little... off (thick eyelashes and a weird shine), but that's okay we're going to fix it! Your sim might also look solid white. If that's the case, make sure you're in the right mode. You can adjust modes by clicking on one of the four circles in the top right of the screen.

These are your viewport modes.
Wireframe (far left) - good for mesh editing Solid (middle left) - good for posing Material Preview (middle right) - what we work in most, shows everything with textures (color) Rendered (far right) - this shows your render preview We'll be working mostly in Material Preview
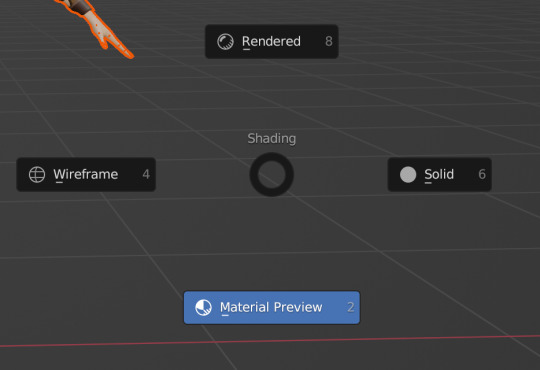
You can also switch between modes by hitting z on your keyboard then selecting which one you want I'll be using mostly keyboard shortcuts but I'll show you how to do both as we go along
Step 2: Adjusting Our Sim's Textures
Let's fix our sim's textures.
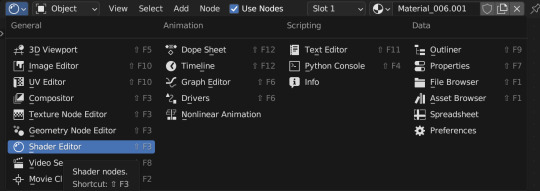
First. set up your workspace. Separate your workspace into two windows (as shown in the picture above with a yellow half and a blue half) and select "shader editor" in your right-side window. Like this:
Next, navigate to your Outliner and click the little dropdown beside "rig"

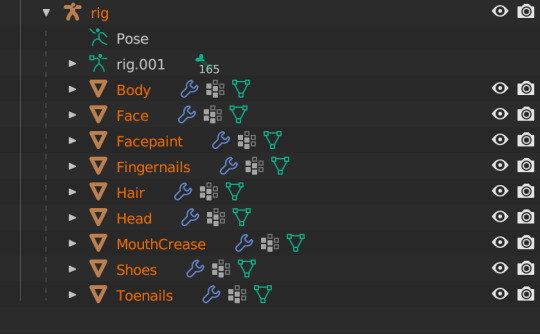
Under "rig" you'll see your sim's body parts listed. We're going to select "Body" When we click "Body", these colored blocks will appear in our shader editor window.

These are called Nodes. We use Nodes to adjust textures for various items in blender (sims, walls, furniture, etc). To add a new Node, you can select "add" in the top bar, or hit Shift+A on your keyboard and add in the node you need.


We're going to add in a Mix Shader and a Transparent Shader (both found under the Shader tab) and adjust our nodes this way:

Snug the Mix Shader between the Principled BSDF and the Material Output. Now we have to connect our Nodes and adjust our Principled BSDF. For the sake of this tutorial, I'll show the basic Node & Shader adjustments, but we'll go into each of them in a later tutorial.
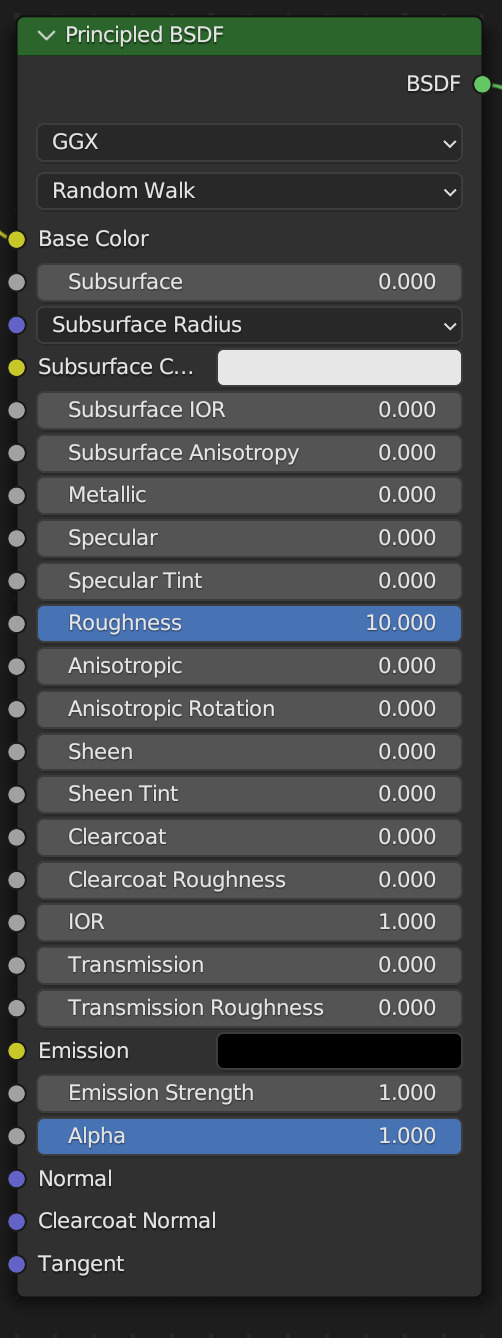
Adjust your Principled BSDF like this, then connect your Node lines exactly like this:
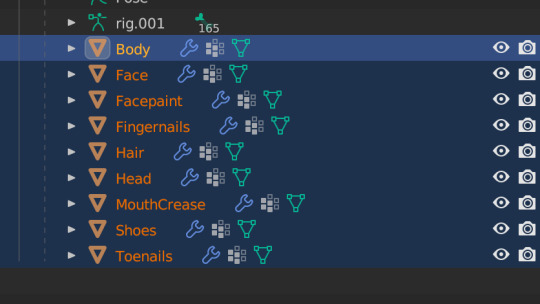
You'll see that our SIm's body looks a bit different from her head, hair and shoes. That's good! Now we need to duplicate that texture to the rest of our sim.
Navigate to your Outliner again, and use Shift+Click to select the rest of the body parts in the list Don't select pose or rig.001 and make sure the Body is selected first EDIT: You'll only see "body" if your sim has a full body outfit on! If they have a shirt and pants, you'll have "Bottom" and "Top" instead! In this case, select "bottom"!
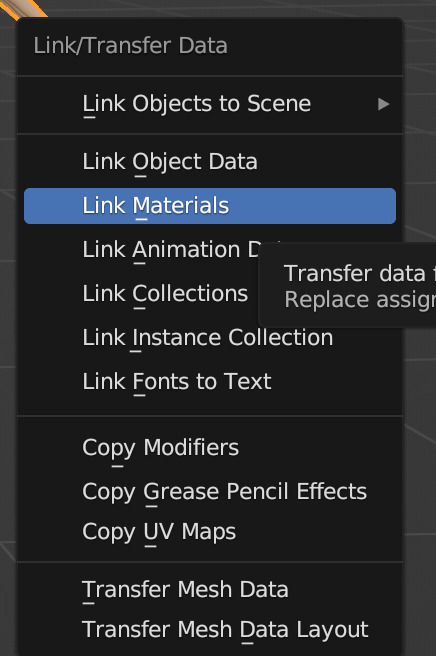
Now, hover your cursor over your sim/the 3D viewport window, and press Ctrl+L on your keyboard. This brings up the Link/Transfer data window. Select "Link Materials"
Our sim is looking better, but her eyelashes are still dark, let's fix that now.
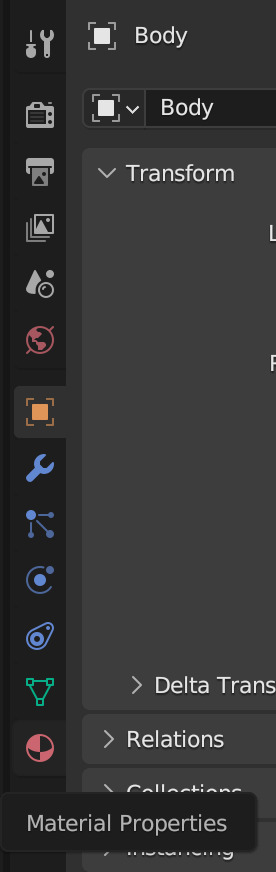
In your Properties area, navigate to Material Properties (the little red ball)
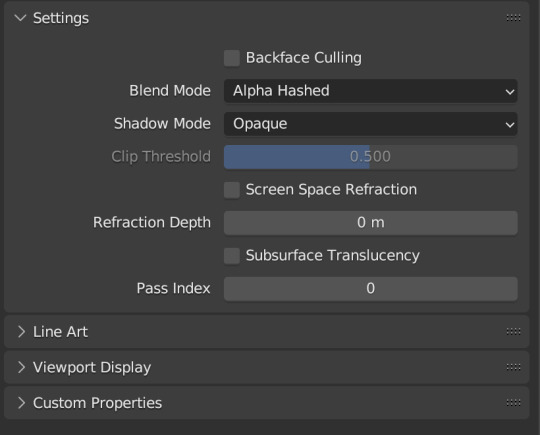
Change your Blend Mode to Alpha Hashed We will always set Blend Mode to Alpha Hashed
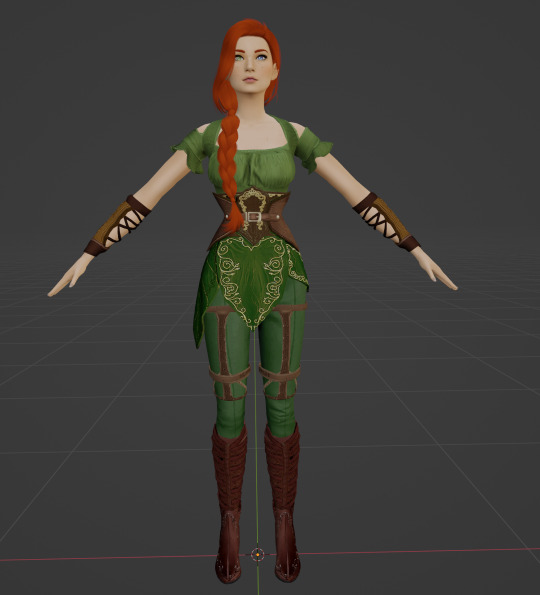
Now our sim looks right!
In Part Two, we'll pose her, set up the scene, and run the render!
#salemsims tutorial#render school tutorial#sims 4 render tutorial#sims 4 blender tutorial#blender#render tutorial#sims render tutorial
163 notes
·
View notes
Text

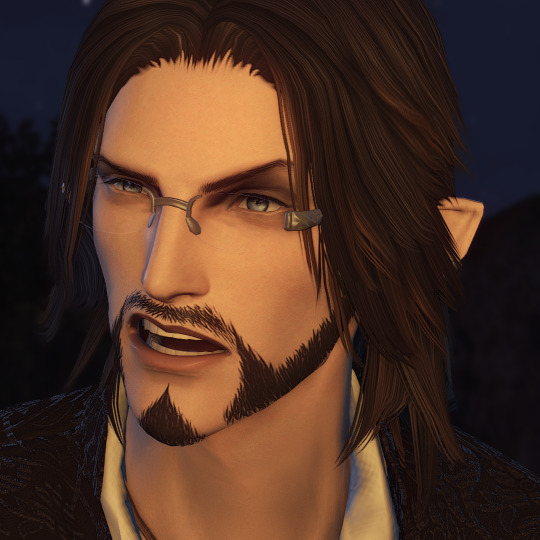
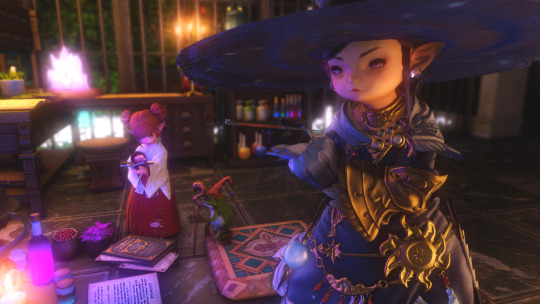
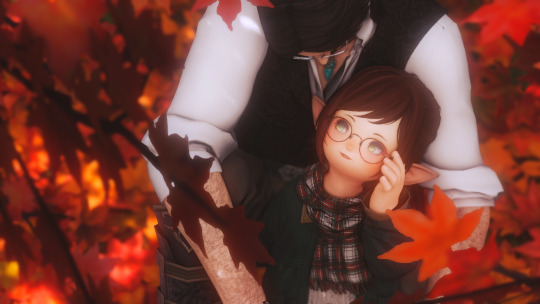
Autumn Day 2 of Glamtober
The days are getting shorter, but that doesn't stop Keathan from getting distracted with their research after decorating for the season! The weather outside is lovely, and Krystdraga must be making some vegetable soup for dinner because it smells amazing.
Just a few more pages, miliy, I'll be in for dinner soon- -Keathan Bael'al-adar Krystdraga belongs to @candycryptids. See their sibling post! House is Aether * Siren * Lav Beds * Ward 11 * Plot 25. Also belongs to candycryptids, we decorated it together! Shader is Neneko Shimmer [Gameplay] Glam items/mod/lore tidbits under the cut
Keathan, White Mage:
Hair- Chihaya- SN Head- Red Brightlily Corsage Body- Inferno Jacket (Metallic Gold) Hands- Light-heavy Halfgloves of Healing Leg- Prototype Midan Trousers of Healing Feet- Casual Boots (Metallic Brass) Earring- Dreadwyrm Earring of Healing R Ring- Ultima Band of Healing L Ring- Ishgardian Knight's ring Face Accessory- Brass Classic Spectacles Ok I will admit i goofed and I thought I did these poses with the same outfit I made for my husband's screenshots >>" But they've documented the outfit on their post so please go check it out! Some lore!
Keathan always wears these two rings whenever they're shown.
Keathan tends to twirl their bangs around their fingers when they're reading something. I tried to pose it here using the way the modded hair naturally laid.
Krystdraga/Sebastian actually doesn't speak very good Eorzean, his native language is Russkiahn, which is just a fantasy/dnd version of Russian. Keathan speaks it with him when it's just the two of them, and they often call each other pet names in the language. Miliy/milyy means lovely/sweet as lovely is one of Keathans favorite words. It's often romantic but can also be used for friends or family.
Keathan's echo gives them the power to understand and communicate in any language fluently. This is especially helpful with their extensive work with the Allied Societies (Formerly known as Beast Tribes).
I don't pose it often, but in other iterations Keathan's right ear is soft/floppy and they're mostly deaf on that side. It makes them easily startled as they can't locate the direction most sound comes from.
#ffxivglamtober2024#ffxivglamtober#ffxiv gpose#ffxiv Keathan#I really liked these shots so I'm using them anyways even if the outfit isn't the one i meant it to be#this is my normal whm glam!#though i might change it soon it's been the inferno jacket since that event#these are also the screenshots i took to learn brio and get back into gposing!#my gposes
8 notes
·
View notes
Note
If ur doing shader explainations: team fortress 2
tf2's shaders seem pretty standard, id guess they do a bit of toon shading on their character models ? not solid lines toon shading but its definitely not using a 1 to 1 lighting calculation
i gave it a quick look and their character shaders are in fact stylized! their default lighting calculations are mapped to a ramp similar to how toon shading is done (that's the warped diffuse in the gif, with the values 0 to 1 its being mapped to are shown in the bottom left) and they combine that with ambient light driven by a volume (as opposed to just one constant ambient light driven by the skybox or a color, so that the ambient light can be different depending on the area)
then they add specular lights driven by nearby lights, and rim lighting thats just always present. their main focus was simplicity & clarity so they picked distinct silhouettes along with not too much noise

video i got this from here!!
129 notes
·
View notes